News: Industry News
13th September 2022
More News
4D Technology event at Rolls-Royce Technology Hub, Derby University
Seminar: 3D micro-surface measurements of precision components, Wednesday 8th November 2023, 8.30am - 12.15pm
12th October 2023 • Read »
4D Technology event at Glyndwr University, 16 March 2023
4D Technology in conjunction with Quantum Design are hosting a workshop ‘Inteferometry for Metrology’ at the OpTIC Technology Centre, Glyndwr University, St Asaph on 16 March 2023.
23rd January 2023 • Read »
A fresh approach to dimensional metrology from the comfort of your desk
An easy way to view the full dimensional metrology range in one virtual showroom:
8th July 2021 • Read »
peen marking / engraving - micro features
Peen marking/engraving for parts identification is a critical element in industries such as aviation, defence and medical
7th September 2020 • Read »
Taylor Hobson Alignment Telescopes help shipbuilding industry meet their green credentials
Shipbuilders around the world are currently facing the challenge of reducing their environmental impact. The alignment telescope is used for accurate alignment of engines, propeller shafting and stern tubes - reducing vibration and wear which cause fuel inefficiencies.
23rd April 2020 • Read »
Alignment and Level in the Nuclear Industry

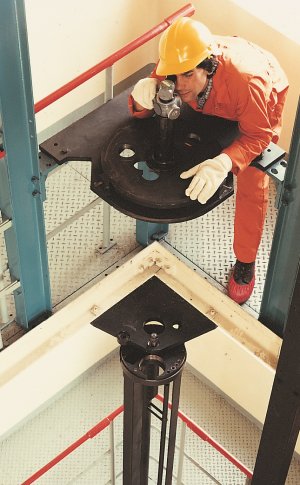
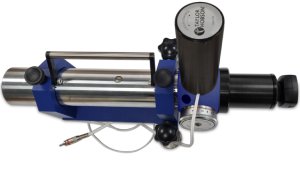
Alignment telescope to set vertical line
Taylor Hobson measurement products have been used for many years in the nuclear industry for checking, measuring and monitoring alignment and level.
Assembly of vertical heat exchangers for use in the nuclear power industry presents problems not usually found in other industries. The requirement is for all the tubes to be vertical and thus parallel to each other. Initial setting of the Micro Alignment Telescope is achieved by auto-reflecting off a plane mirror which has been set truly horizontal by use of Talyvel. Each tube is then sighted using the telescope and brought into alignment.

Horizontal Alignment using Autoreflection
A major advantage of the alignment telescope is the ability to focus through glass windows and multiple windows to define a straight line reference - alignment of items can be made truly vertically or truly horizontally.

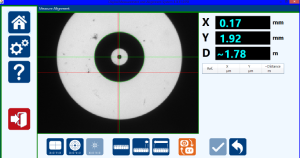
DMAS camera system for alignment measurement
An optional DMAS (analysis) or Vivi (visual) camera system allows the operator to view the X and Y axis without requiring the operator to be close to the telescope. Measurements can be taken and saved or output as a graph/results table.

Motorised focus on alignment telescope
A motorised focus assembly can also be added which allows the telescope to be focused at a distance from the telescope for remote measurement. This comprises a focus control attachment on the telescope and a cabled control box. The operator can focus the telescope to the target using the control box and view it on the DMAS laptop screen.
